HOME>eSIM installation steps
eSIM installation steps
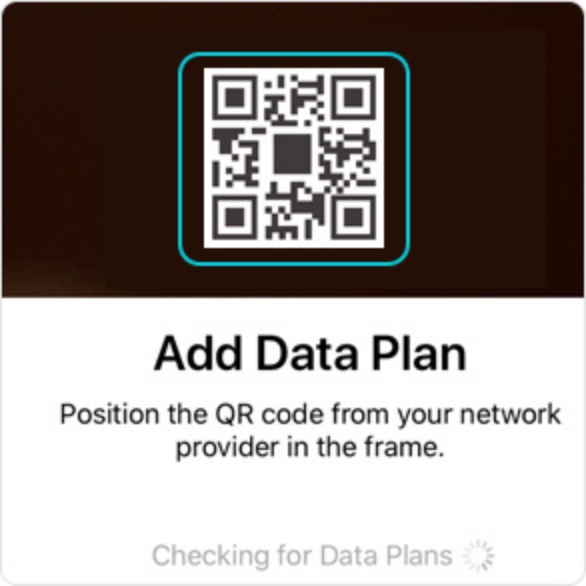
eSIM QR code and user instructions will be sent to your email within five minutes after order confirmation.
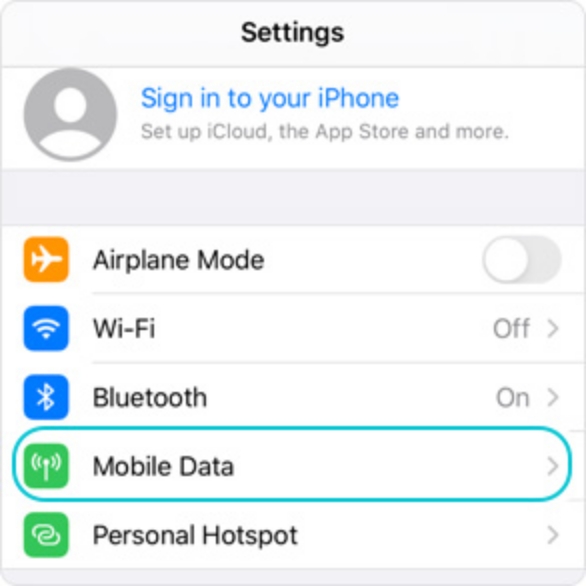
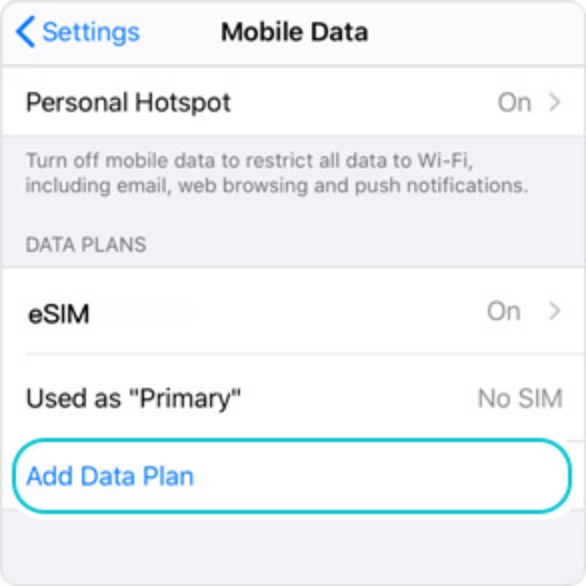
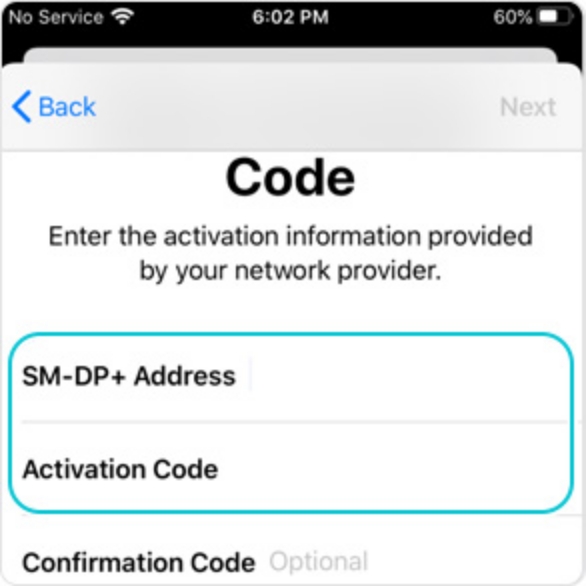
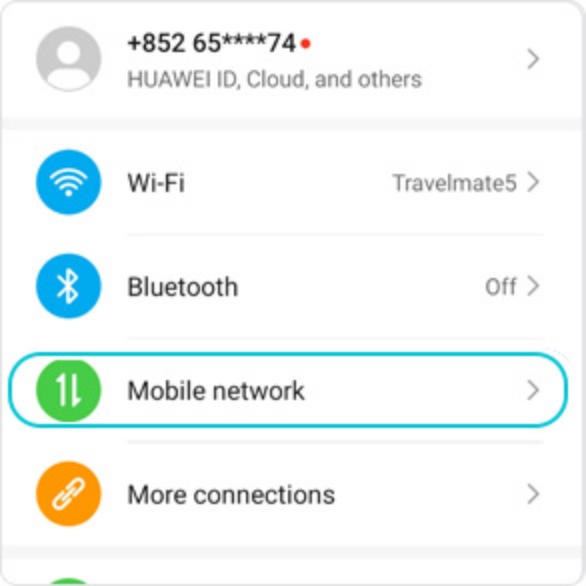
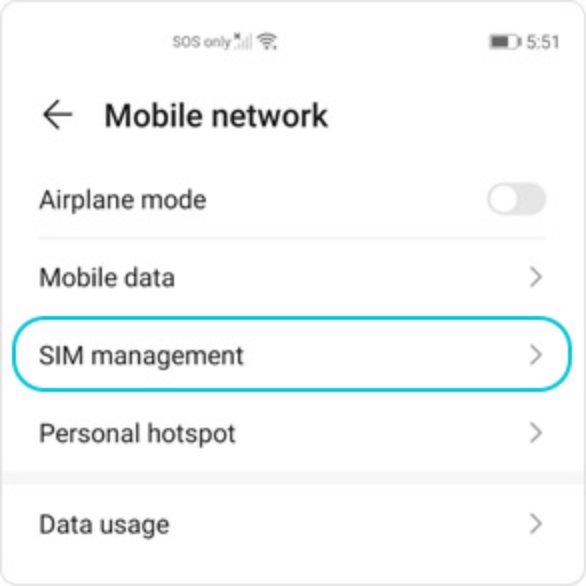
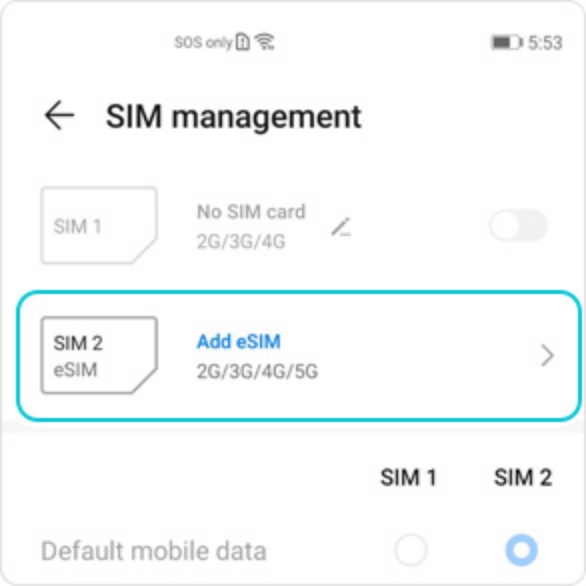
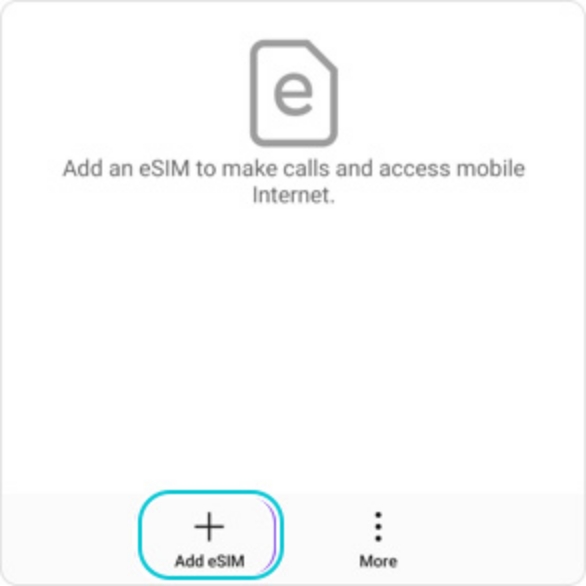
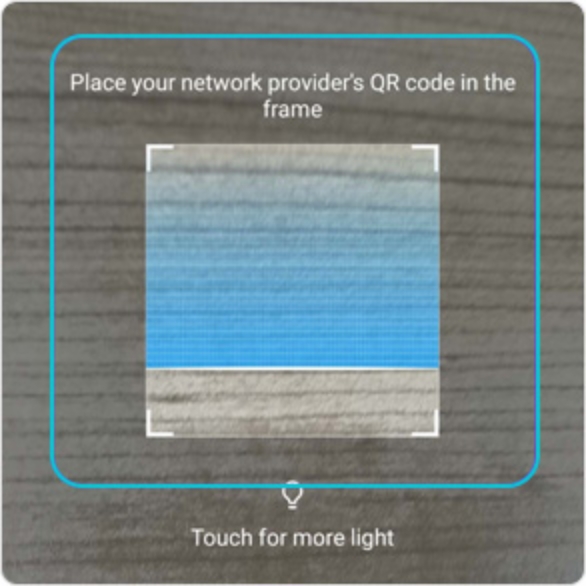
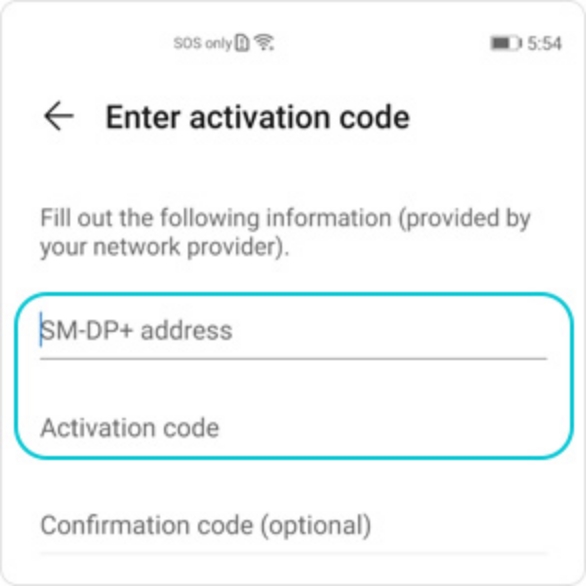
Scan the QR code with your cell phone or type it in manually and install it.

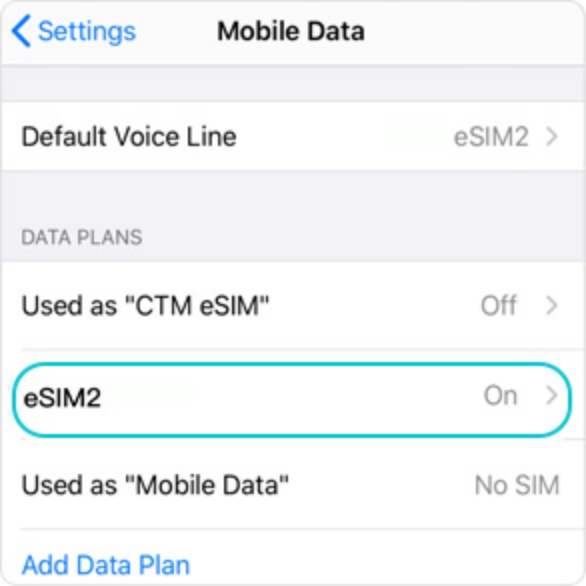
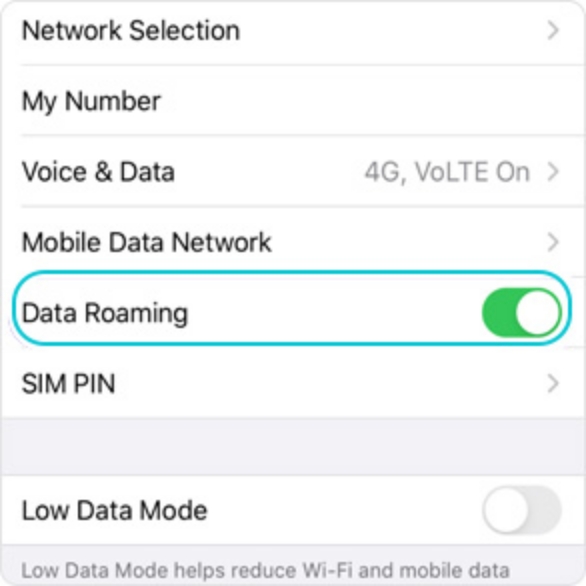
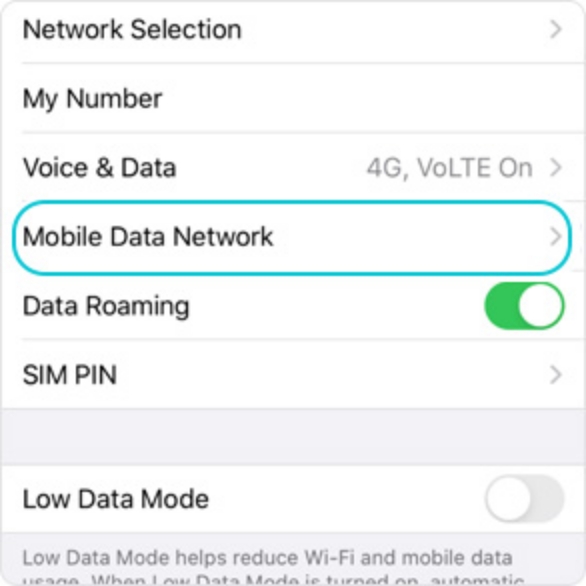
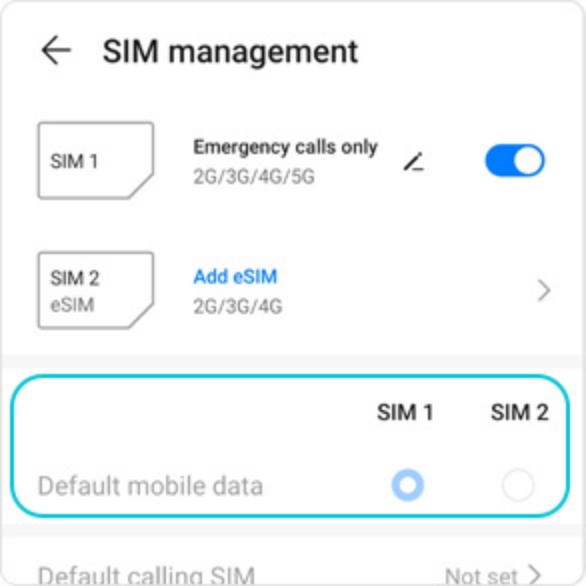
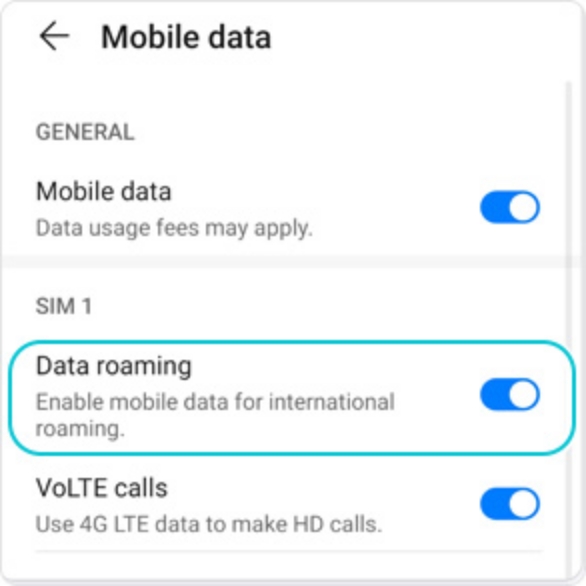
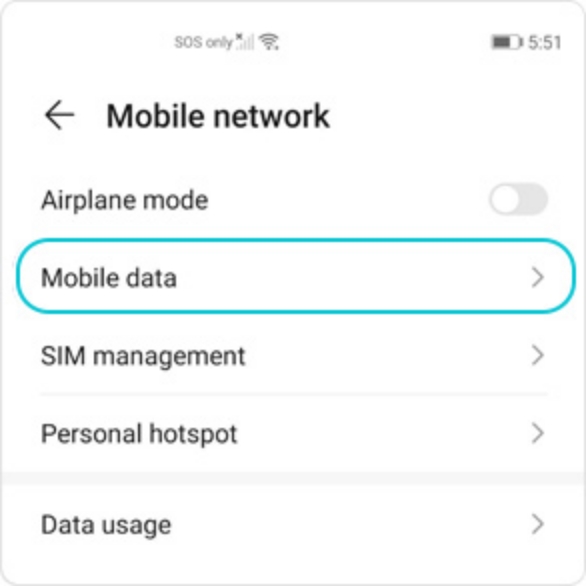
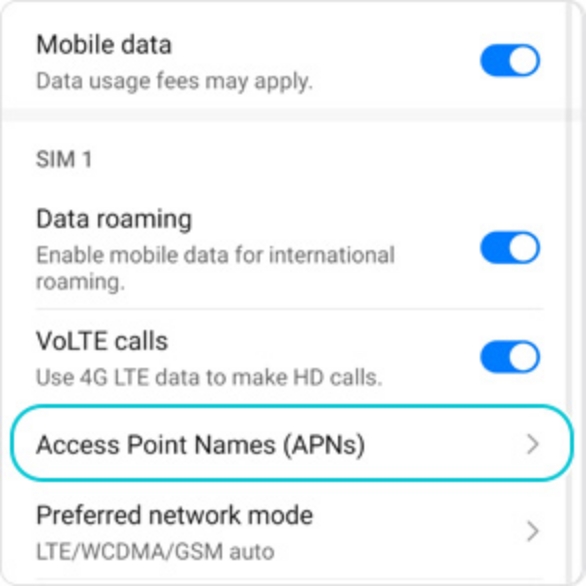
Before use, ensure that the esim line’s roaming feature is enabled.

After registering the eSIM (scanning the QR code), you cannot change to another device or install the same eSIM on multiple devices.

Your card may be automatically activated when you enter the QR code/card number on your smartphone, so please be sure to set it up when the date of use comes.

We will respond to all questions on our own official Line: @014hhnww

  • Steps to install eSIM on your iPhonespan
    Step1
    Adding an eSIM to your iPhone
    1
    Go to Settings, select Mobile Network
    2
    Add data plan
    3
    The camera will automatically open. Please scan the QR code of the eSIM for “Add Data Plan”
    4
    After adding the communication plan
    Step2
    Upon arrival
    5
    When arrive at the destination country, check “Settings” > “Mobile data” > “Added eSIM”
    6
    Enable Roaming
    7
    In “Settings”, go to “Mobile Data Network” and configure the APN
    8
    Enter the APN
  • Steps to install eSIM on your Android phone
    Step1
    Adding an eSIM to your Android phone
    1
    Go to Settings, select Mobile Network
    2
    Add data plan
    3
    SIM management
    4
    Add esim
    5
    Scan or manually enter the eSIM QR code information you received
    6
    Add successfully
    Step2
    Upon arrived,please turn on your eSIM to use
    7
    When you arrive at your destination, open “Settings” and choose to turn on the eSIM you added earlier
    8
    Turn roaming on
    9
    If not work, then need to check and setup the APN
    10
    Go to Settings > Other settings > Mobile network > Access network name
    11
    Set the APN as what it shows in the email
    12
    Set the APN as what it shows in the email